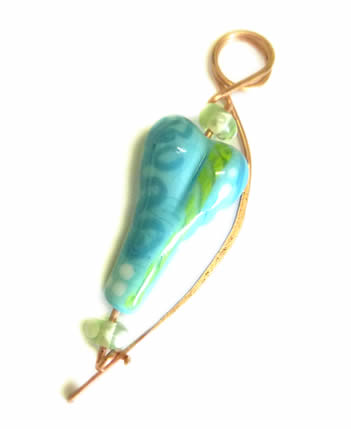
Make a Pin with a DesertBug Designs Heart or Owl Focal

This is a simple and elegant pin you can make using any one of my Focal Hearts or Owls.
|
|
|
Instructions
Click on any picture for a larger view...

 |
STEP 1:
Gather all of your materials and tools together.
|
 |
STEP 2:
Cut a piece of 16 or18 gauge wire about 8 to 9 inches long. Using your flat file, file down one end to a point. Use your cup burr tool or file to smooth both ends. |
 |
STEP 3:
Fine sand your pointed end. |
 |
STEP 4:
Now, using your anvil and chasing hammer, flatten about 2- 2.5 inches in a slight curve working from the pointed end.
|
 |
STEP 5:
Notice the curve of the wire. |
 |
STEP 6:
Following the curve of the hammered pointed end, wrap your wire TWO full wraps in the direction away from the curve. This makes your spring |
 |
STEP 7:
You can use a large or small dowel here, it all depends on the look you want. Keep in mind, the bigger the loops, the less wire you will have left for adding your beads.
|
 |
STEP 8:
Now, make a small loop using your round nose pliers. |
 |
STEP 9:
Bend the wire so it goes points down,
|
 |
STEP 10:
Now string your accent beads, focal, and accent beads on. |
 |
STEP 11:
Make one more small wire wrapped loop
on the end. With the last wire, curve it into a U shape for the clasp hook. |
 |
STEP 12:
With the last wire, curve it into a U shape for the clasp hook with your round nose pliers |
 |
STEP 13:
Check the fit of the clasp into the hook, and adjust as needed. |
 |
STEP 14:
Your pin is finshed!
|
| |
|
Back
to the Main Tips & How-to's Page
|
Lampwork and fusing work can both be dangerous if not properly
undertaken, and you should take care to inform yourself of all safety issues/precautions/and
risks associated with these endeavors.
All instructions/photos on this page are copyrighted
by DesertBug Designs/T. Ryan and have all rights reserved.
This material may not be published, broadcast, rewritten, or redistributed
in any form without express written permission of DesertBug Designs/T. Ryan.
|


